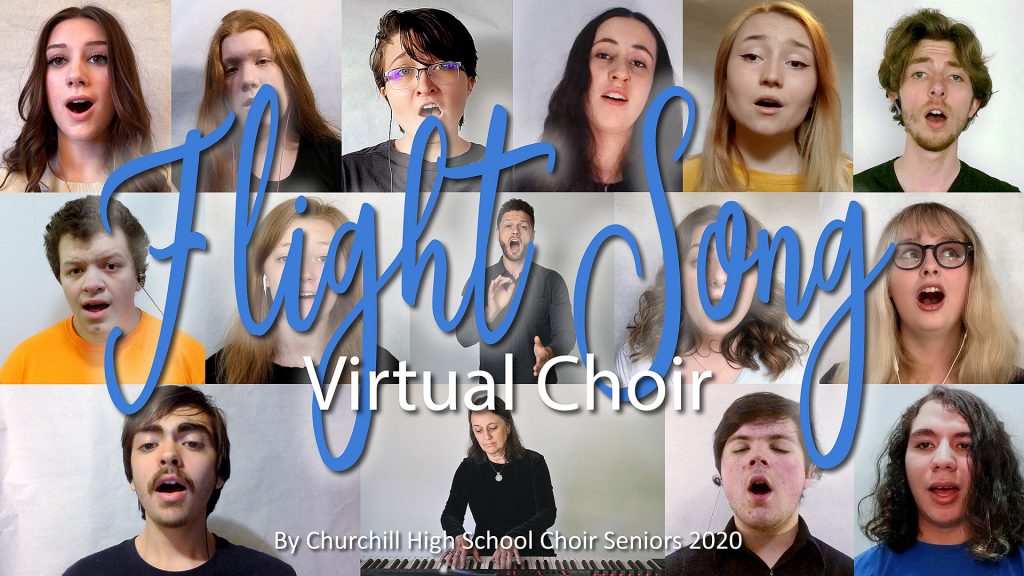
Achieving the Impossible
If you ask a group of choir directors in an online forum or FaceBook group “How to make a virtual choir music video?” The overwhelming responses follow along the lines of “Just don’t!”, “It takes a gazillion hours!”, “It will END you!”, or “It was the worst experience of my life!” and so on.
I can confirm at least one of your darkest fears – It does take a lot of time.
But the remaining warnings may be over stated. Perhaps the biggest obstacle to creating a successful Virtual Choir project comes from going into one without any idea of what it takes to make one. Heading off on a journey with no clear understanding of what is involved, what pieces need to be gathered, what skills need to be used, and no clear destination or plan for putting them all together to get you to your final goal is going to be fraught with surprises and challenges and his a higher risk of disappointment, discouragement or even failure. Having a clear goal or destination in mind and at least a broad understanding of the steps and route needed to get there is the most often overlooked piece of a project like this and yet it is also the most important one. I can help with that.
The next largest reason for hugh amounts of time or poor quiality come from lack of planning and preperation.
You can save a lot of time by settling for low quality like poor audio, poor video, poor musicality or all three. But if you start with any of these issues then you will be fighting an uphill struggle all the way through your project, that will suck time and life out of your soul. You might be able to recover musical quality to some degree, but it will cost time. You might be able to fix a lot of video issues that get submitted, but it will cost time. You might be able to overcome poor design and layout choices… but it will cost time.
For example, if all your singers know their parts well, sing musically and in tune… your mixing and editing audio tasks will be much easier and go much more quickly. If they sing out of tune, sing wrong notes, enter and cut-off without precision, and submit low bit rate, poor quality, heavily reverb laden audio with lots of room or motor noise in the background, you will have 60 hours of audio mixing time and still not get what could have been done with pristine recordings of great performances. If you want to fix all the shortcomings and weaknesses in order to try to bring up the quality you can to some degree, by exchanging time, and lots of it. But you can only go so far, no matter how much time you spend trying to pull rabbits of your mixing and editing hat.
We’ll cover some of these time savers here and we cover custom tailored options if you consult with us about your project (info at the end of this article).
By having a good idea of the overall process and needs, you’ll make better decisions on where to invest time upfront in order to save a lot of time during production.
This is an overview of what goes into creating a virtual choir music video like this one!
There is enough information here to give you a good idea of the basic steps and pieces that go to creating a virtual choir and for you to get a good idea of how much time it will take for a similar project, IF you already know what you are doing. And if you don’t, what skills you’ll need to have, develop or find someone else to help you who does.
I won’t go into all details of recording (at home or in the studio), synchronizing the raw tracks, vocal tuning, note editing, timing, corrections, EQ, mixing, compression, effects, plugins or basic DAW operation here because detailing this process on even one track would be long and tedious. In truth, these things are the heart of the “process” that turns rough vocals into a great sounding choir that can be musically and expressively mixed without distractions. But they are not the map or foundation of what makes one successful. That is the overall vision, and plan for accomplishing that vision. That is the overview of the journey that you need to have before you take your first step.
What I do provide here is a bird’s eye view of the larger process of creating a great virtual choir, even if you only have 13 singers that range from good to pretty weak in their technical skill. Take note, the talented singers in this video are not only the best singers from Churchill’s choir, handpicked to impress. They are a range of singers that every choir has – just like your choir has!
It should be said that the director of this group, is outstanding! Jacob Steinberger is one of the best high school choral directors I have ever seen in my 40 years as a musician. But of course that doesn’t magically make his singers outstanding. He, like all of us builds his choir with the voices he’s been dealt.
My job in helping create this virtual choir video was to do everything I could to help his musicality, and his musical vision for what the end performance would sound like get, communicated as well as possible to students that were not able to rehears together and who were on a short time line to learn their parts and submit their videos. My other job was to guide him in what we would need, and why, and to take whatever submissions we ended up with and turn them into, as close as possible, a visual extension, compliment and accentuation of the audio performance.
In other words, I wanted to help create the best sound and mix possible from what his kids could produce, and marry it to the best visual match that I could to frame and deliver it. The music must be served by the visuals and not the other way around.
We employed multiple techniques to enhance this whole process, which really paid off musically. In the end, the musicality of the director, his students and my own awareness of and enhancement of it, must all be melded together and help each achieve the best final result.
Getting Started
For this project, instructions and detailed specifications were provided to the students, along with video guide/rehearsal part videos and a director’s video for the students to sing to (this contained sync tones at the beginning of the track and verbal cues for things like how long to stay engaged at the beginning and end the song. The students had to learn their parts, prepare their lighting, video and audio on their own, and submit 2 video recordings each. Two full takes were used to all this group of 13 to have enough voices to attain a full choral sound. A lot more goes into this than I have time to list here, but a 8 page document with illustrations, examples, check lists and tips was created and provided for them to follow. This was created after the basic design and look and feel of the end video was determined. You need to think about, determine, and look closely at your final destination before you even start your journey!
I extracted the audio from each video in order to mix that separately. I imported all the tracks into my DAW, Cakewalk by Bandlab (FREE and fantastic!) then synced all the tracks to my sync tones and then edited (tuned/time aligned, EQ’ed and rough mixed all audio (over 40 tracks). The rough mix and later, the finished stereo mix was exported and pulled into DaVinci Resolve 16 for video editing and used as the audio guide for aligning all video takes to. I exported a synced but not fully mixed version early on so that I could use it to get started laying out the base video clips with while waiting for some of the submissions. All video was pulled into DaVinci, and synced to the master audio track, and each video’s audio was muted – forever!
Note: DaVinci has a built-in DAW (Digital Audio Workstation) functionality (Called Fairlight) and it can handle basic, or even more advanced audio and mixing tasks, but not all such tasks and not nearly as easily or as well as Cakewalk. I don’t need my video editor to be a great audio workstation (which it’s not) but I do need all of its power devoted to being a great editor which it is! Edit you audio separately! And now for some more details….
Audio Editing/Mixing
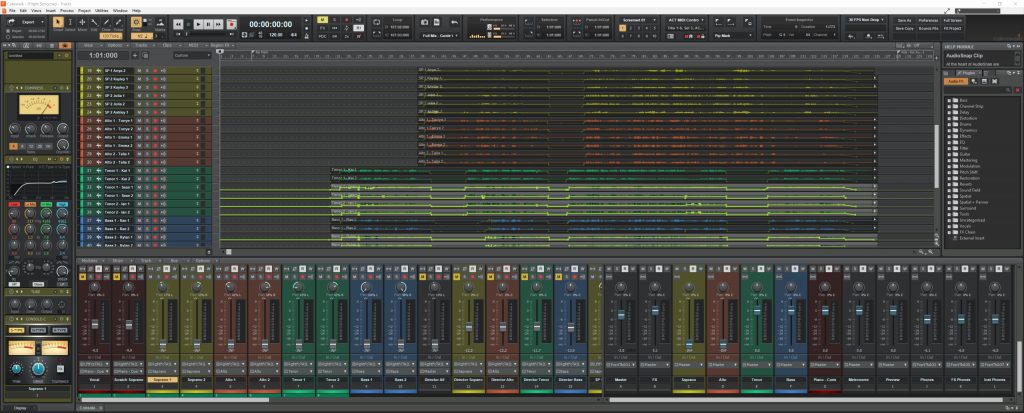
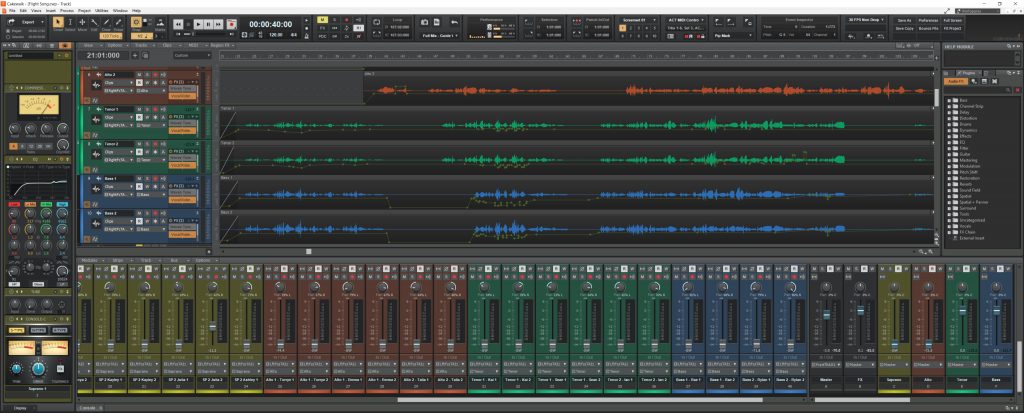
Cakewalk by Bandlab was used for all audio aspects of the project. This is the overall track view with tracks in the middle and console faders across the bottom and master faders at bottom right.
Over 40 tracks to include the guide vocals, director cues piano and part takes.
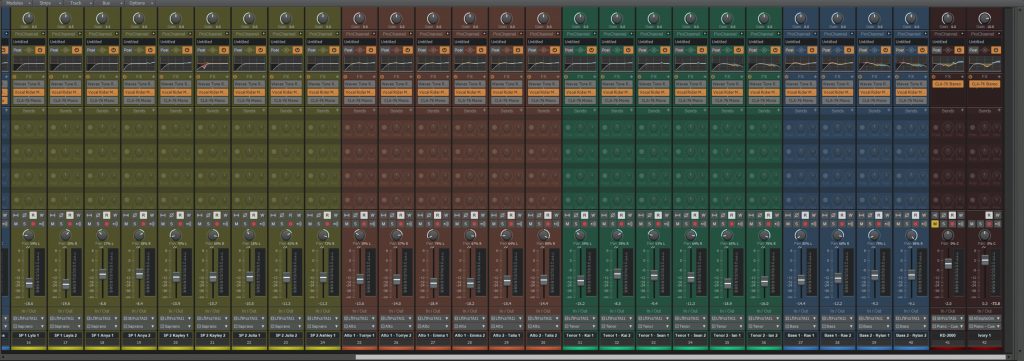
This is the shot of the parts buses. All the sopranos were mixed and EQ’d so that they balanced and had a unified sound. Each part was then fed to a separate buss, like Soprano (Yellow) Alto (Red) etc. This allowed dynamic changed per section to be easily mixed and automated while Mr. S sat on our front porch with a neighborhood cat in his lap, listing on headphones and talking back via a microphone and watching via Skype. If a single voice was sticking out because of their volume or tone, vowel or consonants (missing or too loud) this was all mixed on a note by note level per singers track(s) and then mixed as a section. All vocal tracks were tuned, time synced on a note by note basis. So… thousands of detailed and precise edits, fixes, tweaks and polishes. Sectional moves of lines, consonant alignment and even breaths were slide, moved, removed or brought out for every singers parts and both of their tracks. Anything that was not perform perfectly, had to be fixed by me, until it sounded perfect (within reason 😉
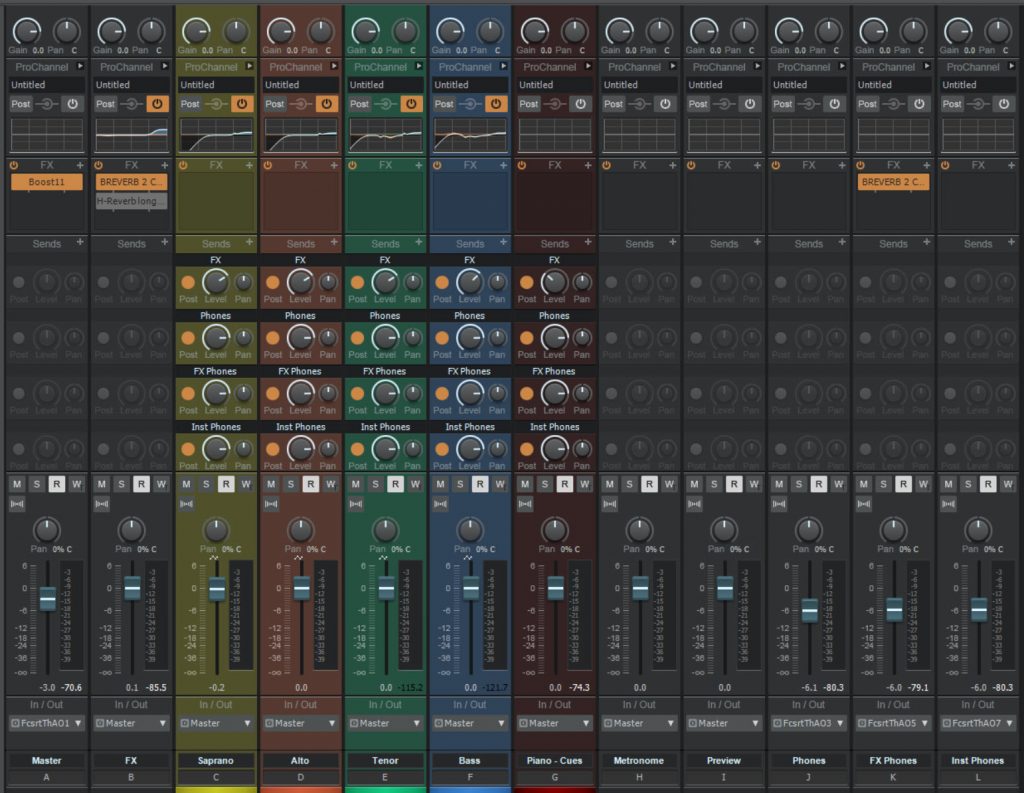
Section volume changes shown below applied to the section buses:

All tracks view, showing vocal scratch, guide parts, director cues, and soprano and a lot tracks:
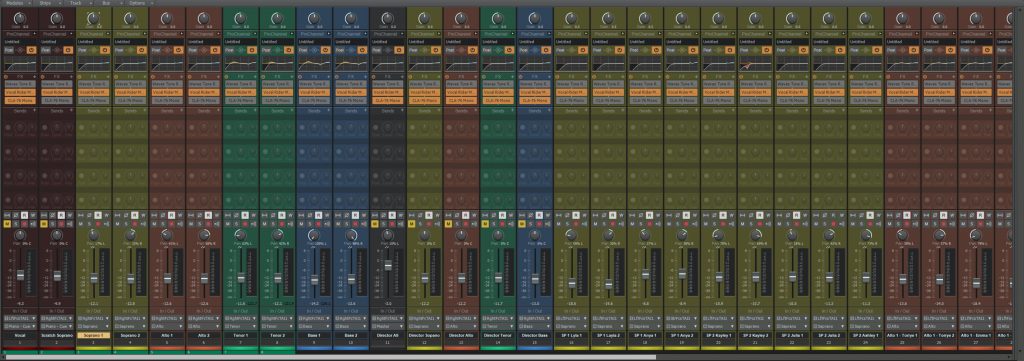
All tracks view continued, showing tenor, base, piano tracks as well as Master, Effects:
Rest of track view showing Master, FX, Soprano, Alto, Tenor, Bass busses and a closer view of some tenor and base wave forms, in which you can see some of many volume changes represented by the light green lines and little dots.
Don’t Trust Auto Tuning Plugins!
Another step we took was to export part mixes for the director to check. I tried to do a very detailed pass at fixing things while editing. But the reality is that with 30 vocals, and often problems that show up when all parts are combined, are not easy to find on a track by track basis. By sending a mix of just 1st sopranos, 2nd sopranos, 1st altos… for the director to listen to and catch things that I either didn’t catch or didn’t know the song well enough and all the notes that each part should be singing, allowed him to generate a hit list of what I missed, what could be tightened and whose voice was the likely place to look, was very helpful. More than a few times I had missed tuned notes that were so far out that the auto pitch correction plugin I used, as good as it was, had no chance of knowing what the right note was and would pick a note that, when soloed seemed fine, but was still the wrong note! Or parts that all the altos sang together, but wrongly, could be called out and slide over in time for entrance or cut-offs to put them where they should be. Proofing is a critical step in editing/tuning. Ultimately, phrase, note, beginning and end, was checked, tuned and tweaked by my ears. this is painstaking and slow. Much more so if kids are 4 half steps off of notes that they didn’t ever really learn or slide into almost the right now after traversing three more along the way.
Plug-in’s
I don’t have any screen shots for the various plug-ins I used like Melodyne’s Pitch Correction, VST plug-ins and F/X like Reverb/EQ, Compressors, Levelers and more – Sorry! But you can imagine that there was a lot of work carried out just on the audio side. Every note, entrance, release, timing, intonation, and individual singers EQ was check, and corrected when needed. Total audio editing time was about 60+ hours. More singers would help cover inconsistencies, but add more tracks work to do, so there is no more is better or less is better sweet spot. Ideally, more is better if everyone were professional level singers. Then you would be able to let a lot of things go and there would be less bad notes and such to worry about anyway. Most of us don’t have professional level singers in our choirs. (Even college level choirs often don’t).
Video Layout/Design
For every layout in the video, there is a separate timeline with all the tracks (screen shots shown later). Each one is really just the basic layout with all the same shots moved and sized differently within the layout, and all those 9 separate tracks get used and sliced together on the main timeline (the one with the lyrics). That is the overview… here is how it happens!
Each video is color corrected, graded and time aligned to the master audio that came from Cakewalk. Time aligning is quick if there are sync tones that can be heard on the video. If not (it is amazing how many students assume that the phones microphone is the same place as the camera lens ;-), alignment must been done by hand, sliding things one frame at a time, and playing through a large portion of their take to make sure it’s synced well to every mouth movement (It’s expected that in a test render some will be wrong and must be tweaked). This is because some times they audio/video provided my itself not be in sync!
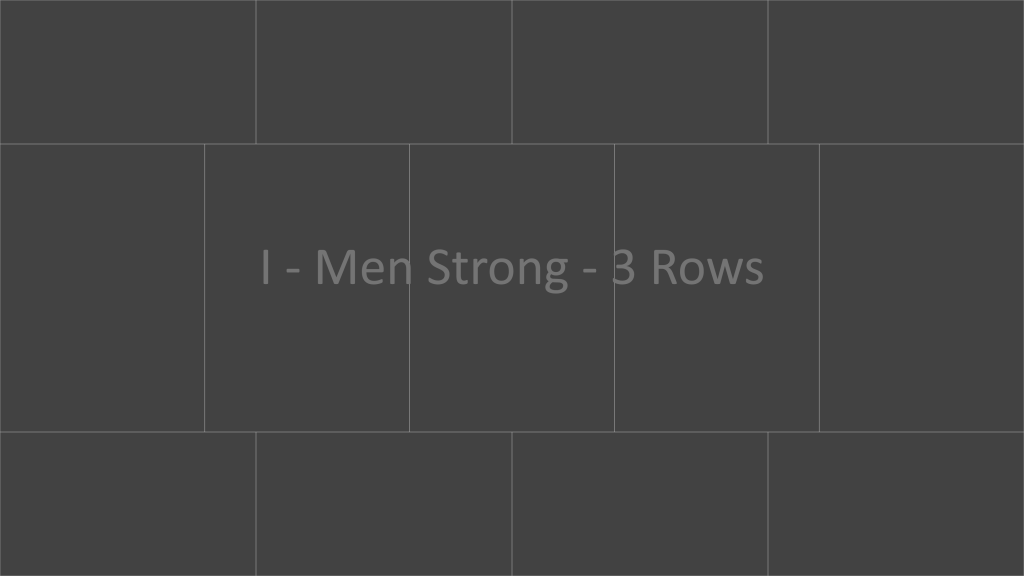
Then all the video gets sized and moved into a master 16-up layout with everyone’s video synced and graded as a base to start from. It’s a digital stake in the ground that lets you get started and becomes a master set of all videos, pre synced and pre graded, that can be copied to a new timeline for re-arrangement and re-scaling visually to create a different layouts like you see in the video. They include:
- A – 16 Up
- B – Men strong
- C – Ahhh’s
- D – Girls Strong
- E – Piano solo
- F – ASL Center
- G – ASL bottom
- H – Epic Choir Ending”
I – Guys center

Note that the design choice was made to not use divider grid lines between singers (as most virtual choir videos do). Various colors and widths were tried but, while they all created a cleaner division between the frames, they created more noticeable divisions between the frames and took away from the feeling of everyone being in the same space.
However, this choice had production consequences. Grid bar dividers would have covered up sloppy or loosely sized and aligned video sizes and placement which would have saved A LOT of layout time. Without them, pixel perfect alignment of all for edges of every video was required in order to avoid gaps that would create black lines between singers or miss-aligned corners. This was a painstaking process in DaVinci Resolve because there are not pixel based scaling controls in the program. Everything is percentage based and cropping is counter intuitive and cumbersome to apply, and buggy!
To save time, each layout is thumb nailed on paper with pencil (pen) and various options are considered for the same section of the song. Then I created a layout guide with the layout precisely drawn in Photoshop to create a guide image. This was pulled into DaVinci and used as a background for scaling and aligning each video to, which gave the layout strong symmetry and made it easier to line up the frames to each other. Sometimes layouts were tweaked and ended up being different then the guide (the “I – Epic End Shot” for example) but having the basic starting place still saved time.
They Start Like This:
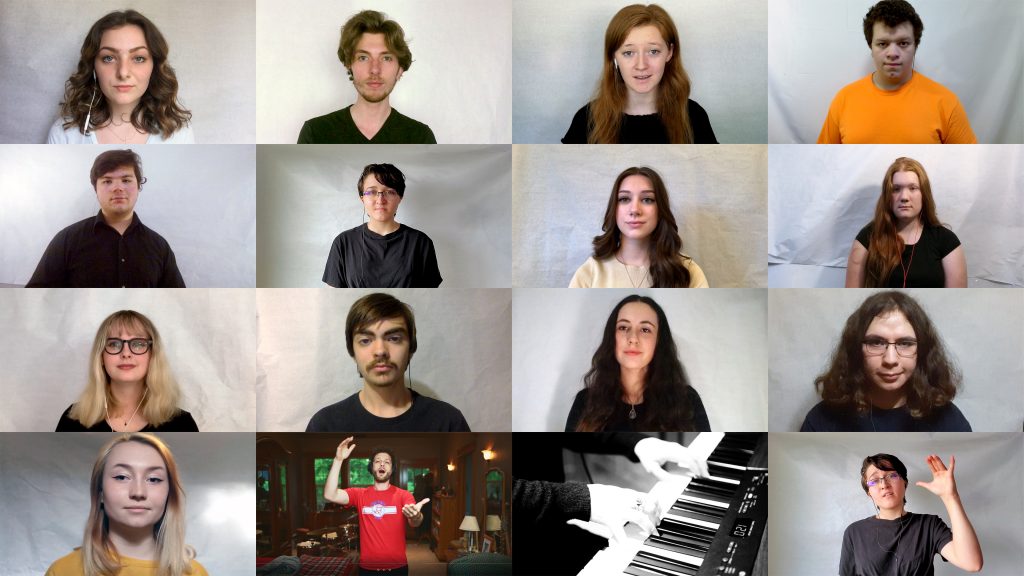


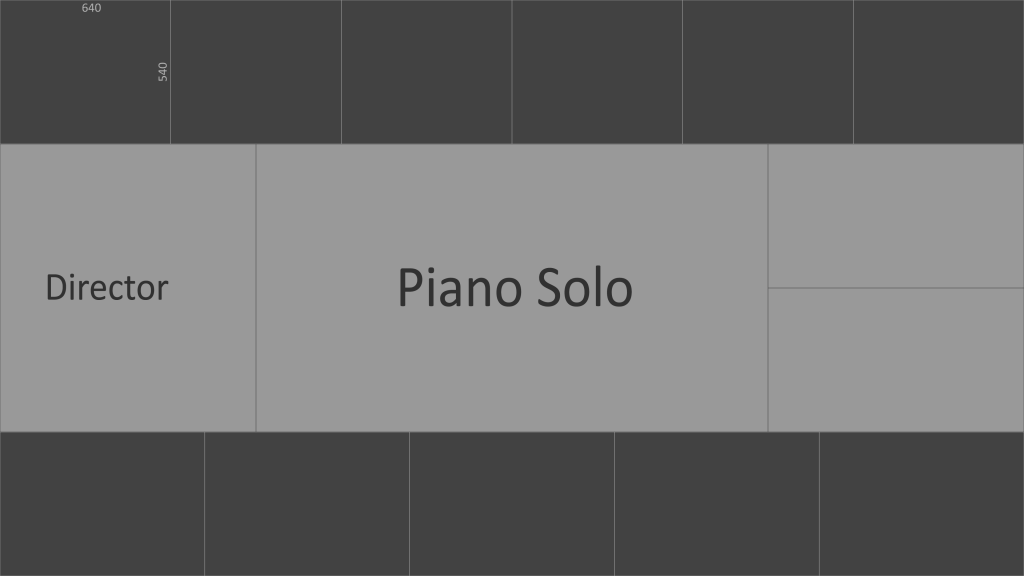


End Up Like This:
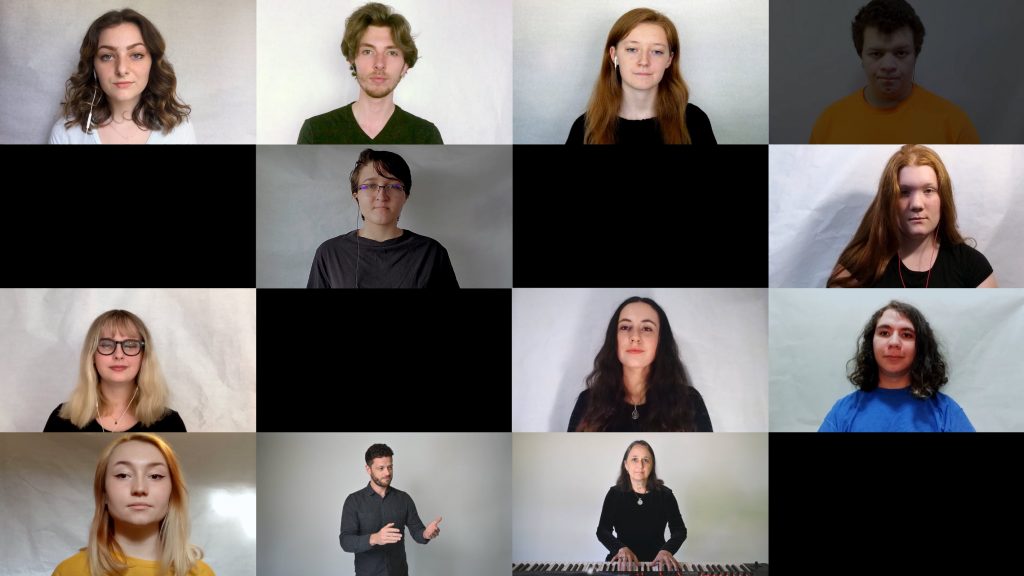
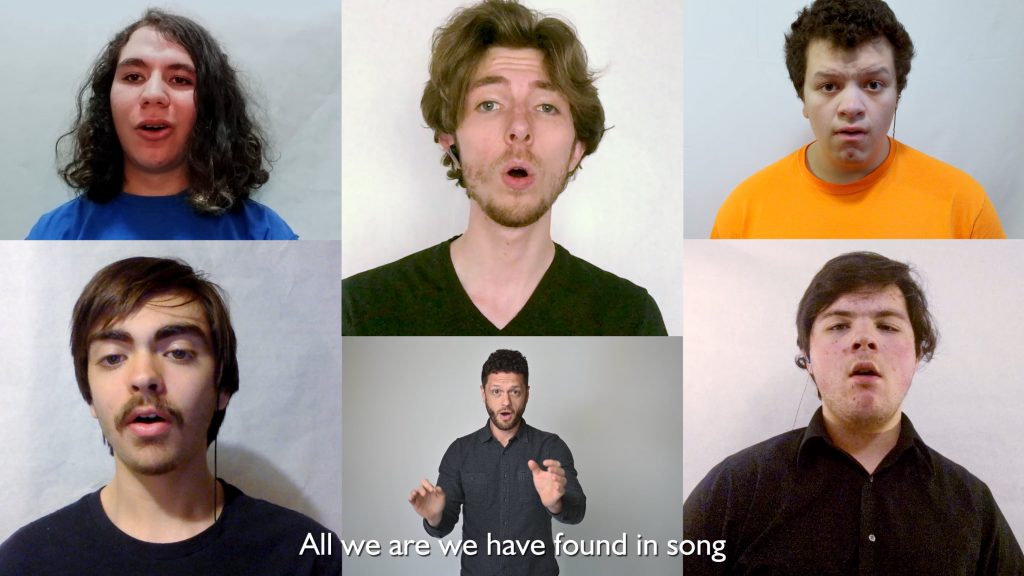
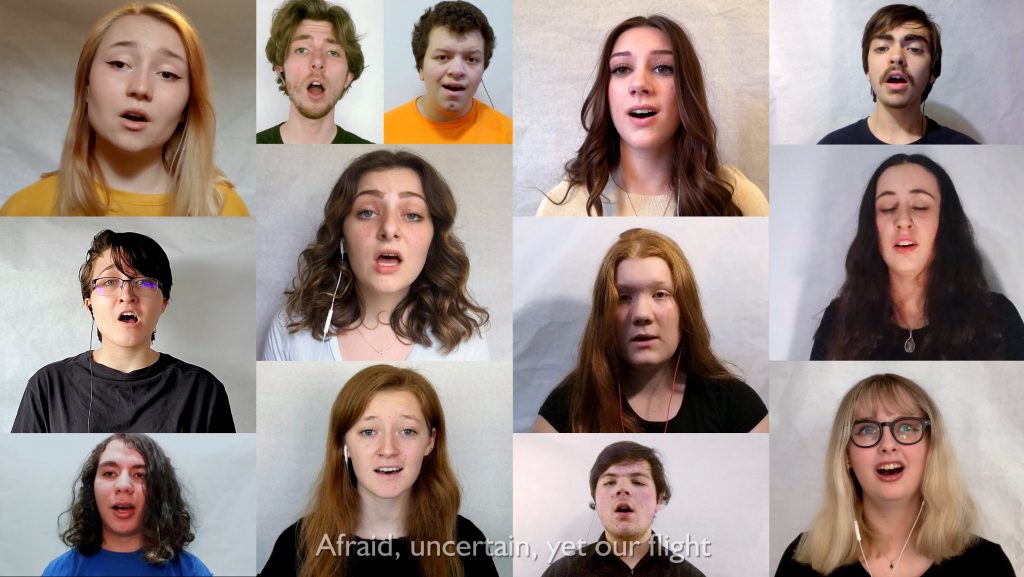
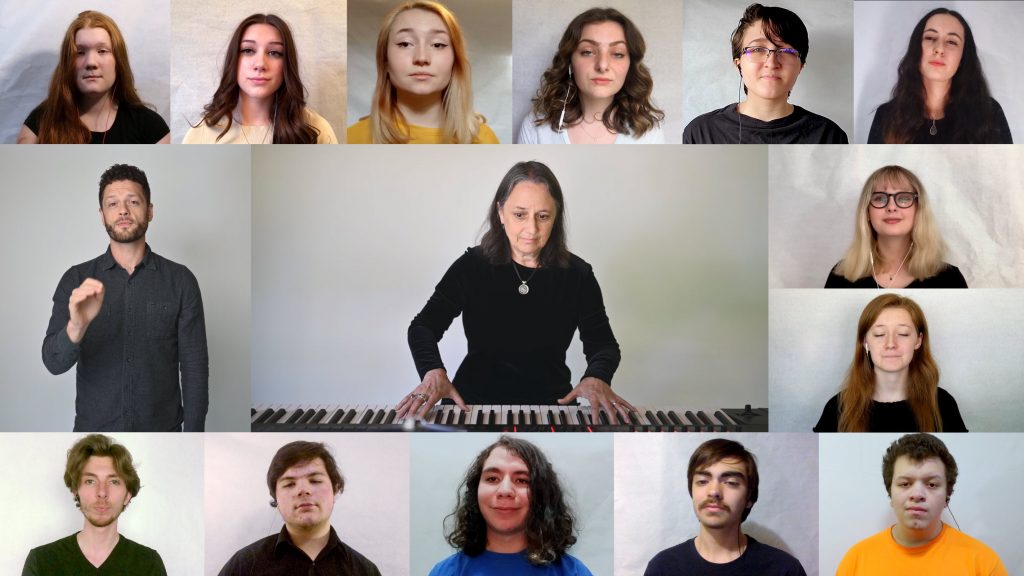
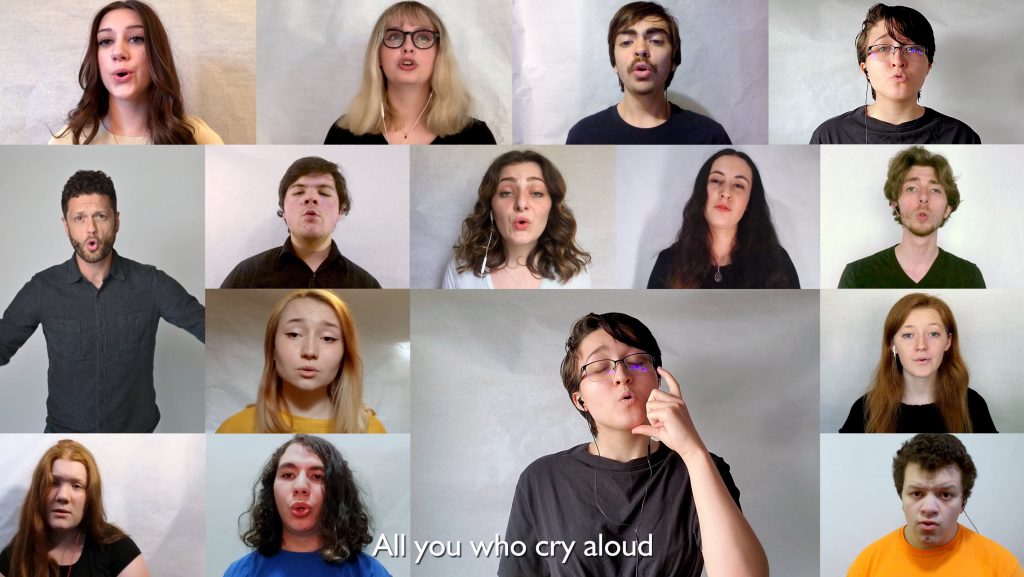
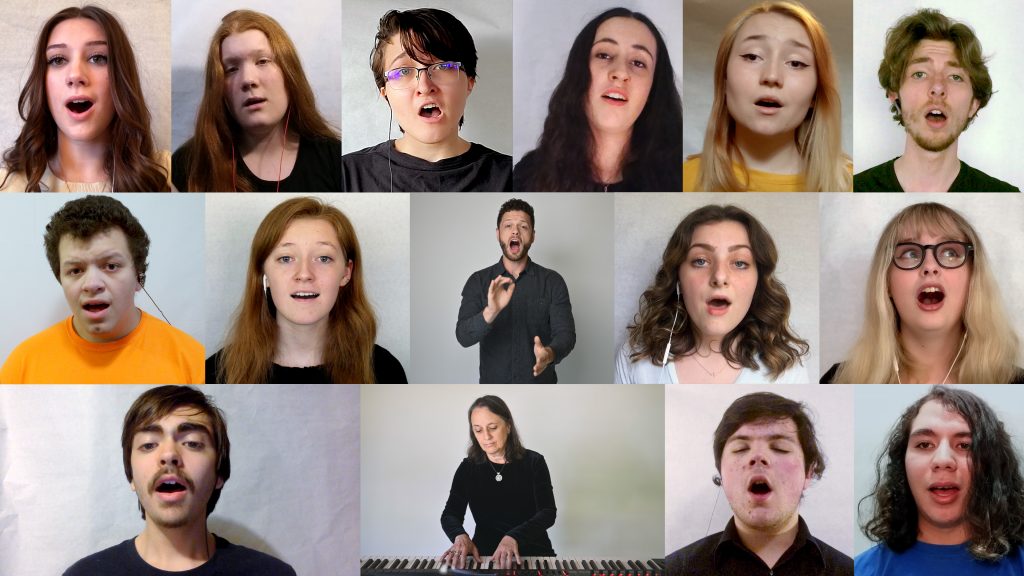
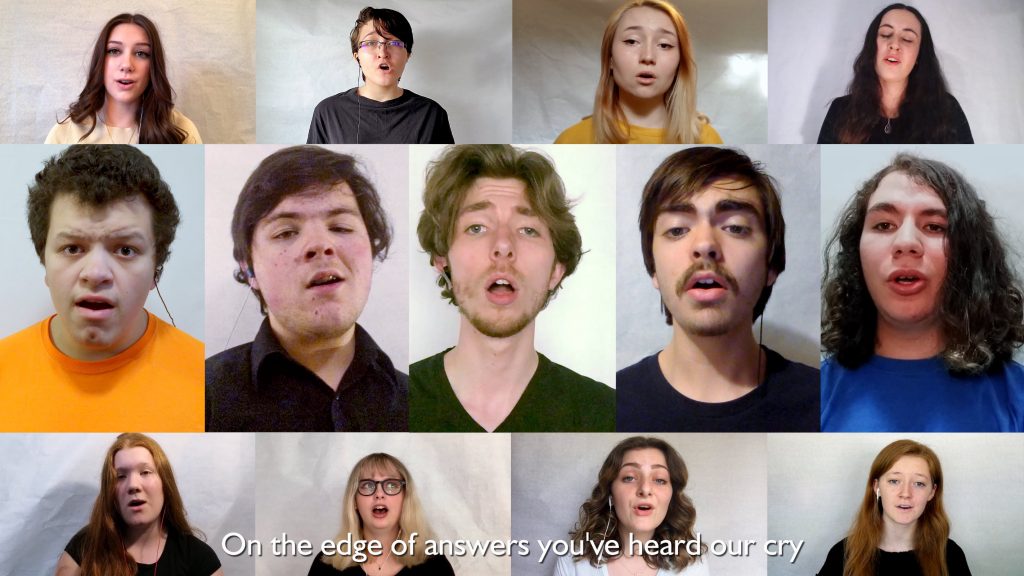
To create the layouts, I first spent some time just sketching out various thumbnails on paper with pencil/pen. Ugly, sloppy, and hardly artistic. But this got my brain going and thinking about various ways I could lay things out and also let me compare layouts right alongside each other. I did two pages of these the night before I was going to start doing my real layouts and another two pages of them in the morning. Then I chose my favorites and picked the first one that I wanted to create after the master 16 Up shot. But I quickly realized that making them in DaVinci was an exercise in self-punishment. Not guides, No snap to edges or guides and no absolute pixel controls. So I started making the above templates in Photoshop at 4k resolution (3840 x 2160) with single pixel lines to size things too. This saved a lot of time and misery, but did nothing to enhance DaVinci’s lack of features for this task.
Ultimately, each layout was created as I worked through the song and created different layouts to help visualize what was going on in the music and then, when appropriate, I could cut back to previous layouts. I ended up having 9 different layouts which allowed for enough visual changes to keep the viewer engaged visually as well as audibly.
I used cross-dissolves to change between scenes in order to create and maintain a smoother, dreamy feeling though out the piece. It’s common practice to use simple hard cuts between shots these days. This is in no small part because there a so many young creators that have never studied the power of transitions in editing. Cross fades or cross dissolve transitions actually create a gentler, dream like suspension of time and continuity to the visual images being moved to. It blends one shot into the other, keeping us from thinking… “Oh! We just changed scenes!” When I edit, I choose the type of transition to match the nature, style, pace and intended purpose of each visual transition to best serve the goal of the video.
I created each layout to showcase the parts, voices and mood of the song as it progressed. I hand tuned the placement and speed of fade in and fade out of each line of lyric so that it matched the occurrence, and mood of the performed lyric. For example a slower fad in and much slower fad out were used on the slower more tenderly expressive sections of the song.
Likewise we chose a white background that I knew would generally be gray in your videos, so that I could have a more consistent and visually simple (un-clutter or distracting) background that would merge each shot into what would become a cohesive overall look and feel. It’s not perfect or clinical, there are wrinkles, variations in brightness and lighting, but it’s close enough to work. It’s also helpful to have the background white as it help color balance the shots, which came in from all over the white balance spectrum and many with mixed light sources.
Everything… was intentionally designed, laid out, edited and tweaked to enhance the emotional expression of the performance and to minimize distractions. The song has an angelic ethereal mood to it and I wanted to align with that throughout the piece. Budget and time constraints prohibited filming everyone on a sound stage with angelic costumes and wings while flying around in the clouds on wires! – Sorry! 😉
Each layout takes about 2-4 hours to create, render out, check and then go back and tweak, render out and check again for tiny alignment problems.
Many little changes require listening or watching audio/video over and over to finely tune each edit, change, transition, mix level and tweak. So you get to know every breath, consonant and mouth noise on every track and every blink, mouth shape and so on per frame.
Your level of detail in observing audio and video and being able to discern subtle things and when and how to fix them, will directly affect your end results!
Video Editing
These are screen shots from the video edit process in DaVinci Resolve.
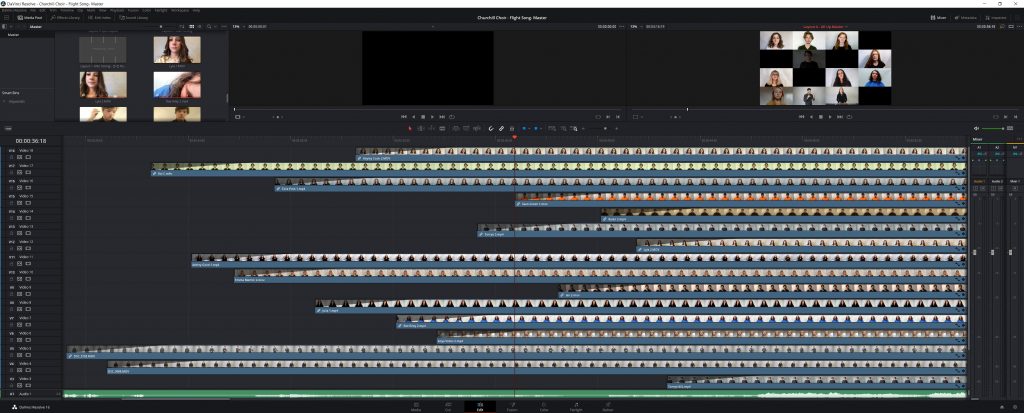
This is the master shot. 16 cells, 16 people, 16 tracks of video, synced to the master audio imported from Cakewalk. Later I applied a staggered entrance with a 4 sec fad in, and a staggered exit with a 2sec fade out at the end. Except for Emma, I was unable to get her video to fade out until after a few more seconds went by for some reason 😉 This was the opening and closing shot of the whole video.
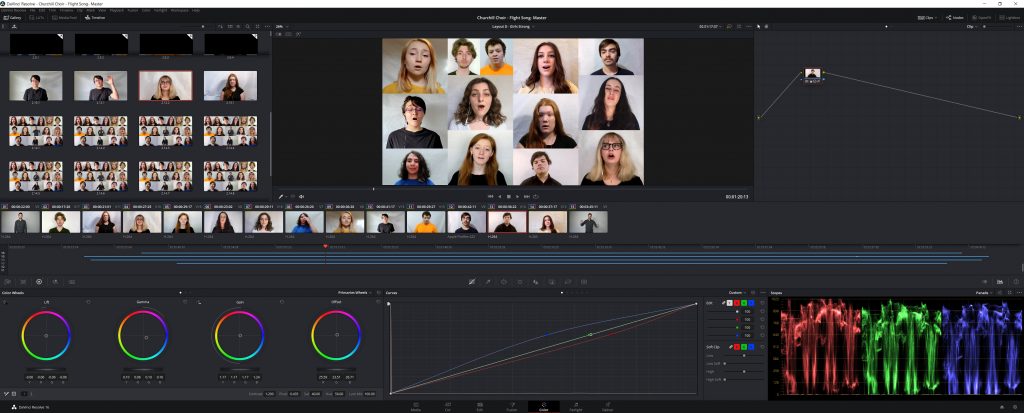
The next step was to color correct each shot of brightness, color balance, contrast, saturation… This was critical because every other layout would be based on and use this same footage with its corrections so I would only have to do it once. Example below shows the color grading screen, but a different layout.
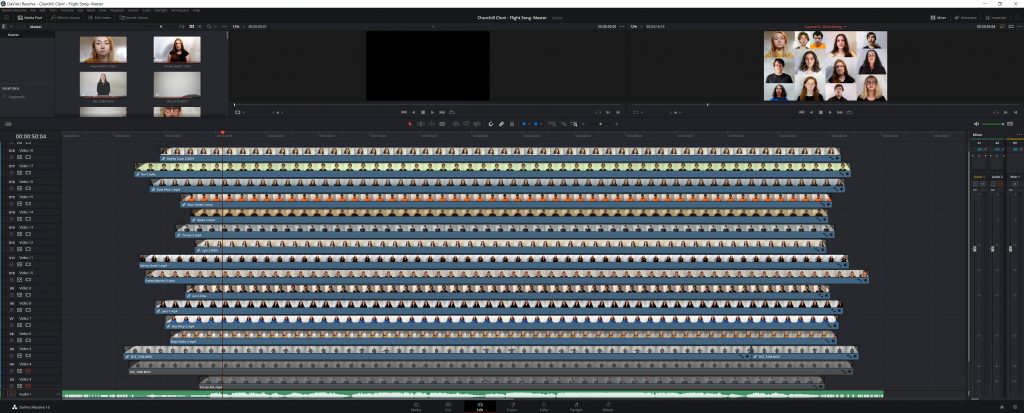
Next I needed to create the different layouts. I didn’t know if there would be 6 or 15 different layouts when I started and you can see from my notes that I drew a lot of potential layouts (4 pages and over 70 thumbnails!), some of which I used to get started and some of which I make along the way as I discovered that none of the ones I need had been sketched out yet. This is an example of “D – Girls Strong” layout (Oh man, I’m sorry, mean “D – High Penguins Strong”. It’s designed to show the low parts who have a counterpart, smaller. But this section is all about the high parts, Soprano/Alto Penguins coming in with their beautiful melody line after the low penguins, (not that same as short), had their intro unison verse.
The next step is to do the above over and over as the song progresses. Creating new and pleasing layouts that show case key lines like the “Ahhhh’s”, piano solo, Torrye’s great ASL feature, all singers and the “Epic Choir Ending” layouts needed to help tell the musical and vocal story visually.
It turned out that this took 9 different layouts discussed above (some used more than once) which took over 35 hours to create because each one must be slowly and precisely edited for perfect alignment with all sides and positions.
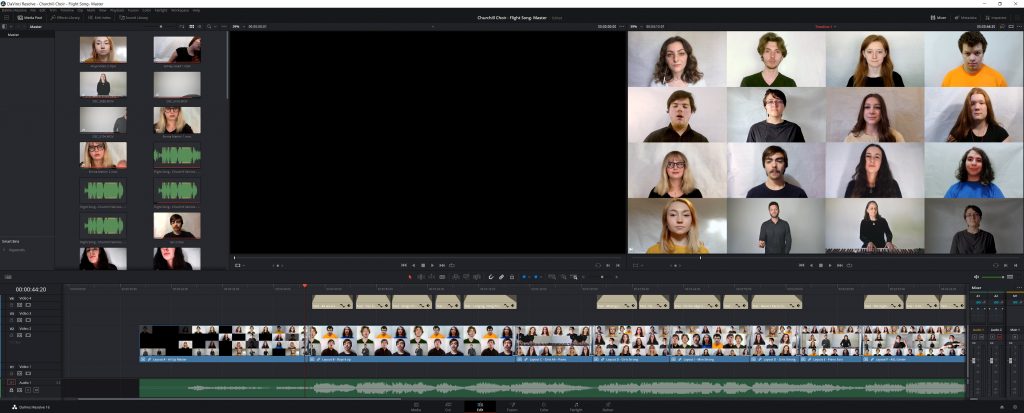
Below is the main time line. This is where all whole project finally starts to come together!
I don’t have fast enough machine to playback more than 4 or 5 streams of 4k video at the same time. So I will never be able to play back even one of these full layouts in real time to see if everything is OK.
Instead I have to work semi-blindly, then render the whole thing or sections out to see if they are what I think they are. This takes about an hour and a half to do, so I try to get a lot of things done, then render while I eat or take a break then come back and check for what needs to be fixed or moved or tweaked and dive back in.
Note: I could also render out each of these scenes as a separate movie, and then edit the movies together but It wasn’t quite cumbersome enough to do that. More singers, more video to combine… that would be the only way to make it work. Then I could render out ¼ screen sections, combine them so that I would have 64 singers! Then I could even render those out and combine them 4 to a screen and have 256 singers on a single screen… or again and have 1024 singers! But… I digress!
What you’ll see in this time line that I’m splicing together different layouts as if they were separate videos and when go to render the movie, DaVinci will pull from all the different layouts and assemble the move with the right transitions and overly the lyrics. It’s pretty amazing. Literally combining 16 video tracks in 144 different sizes, crops, locations and time frames and lots of different transitions and color adjustments into a single video with the audio from over 40 tracks and laying some lyrics on top of it all.
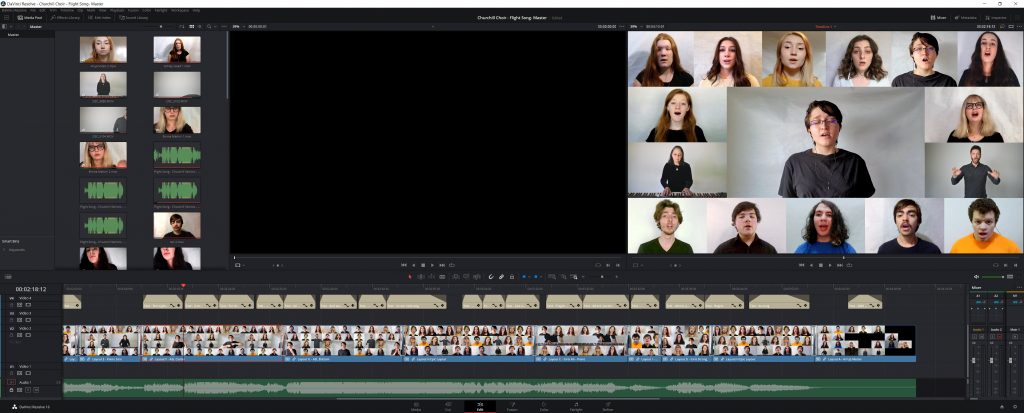
This next shot shows the lyrics being added in, generally, they are put in and moved around and then tweaked to match the mood, tempo and pacing of the place they appear in the song. Again, tuning of the visual elements to match and help the audible sound and to enhance the feel and emotion.
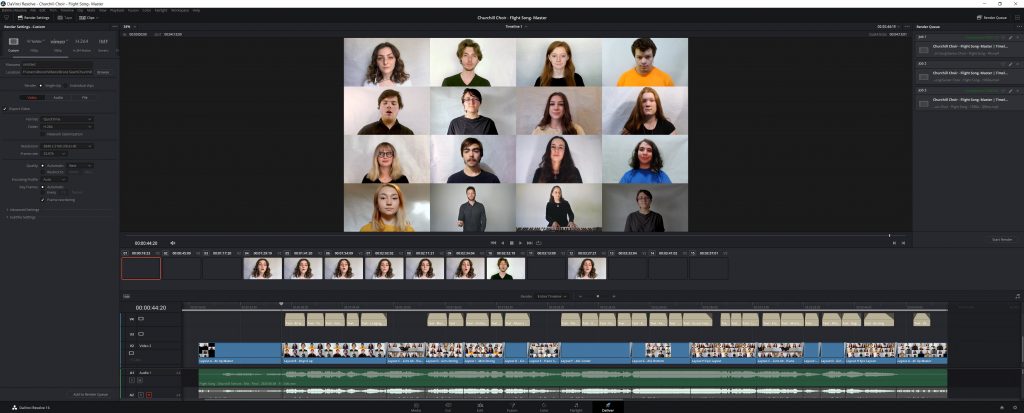
This last shot shows the delivery screen… ready to export, I start the export at the beginning of the video (after the sync tones, which are trimmed out visually but still in the track if needed later) and finish at the end of the last video take. (And before the sound track ends which is again trimmed off visually and sonically to not be in the video)
Total video editing time was about 60+ hours.
Production
As you may have heard, creating a project like this takes a lot of time. It’s hard to imagine just how much time and where the times goes! Indeed, while working on it one tends to lose track of time, the world around them and even a sense of reality! Here is a basic breakdown of time for this specific project.
Production (Audio/Video/Conception/Design/Producer)
- 40 hours pre-production time to create recording/video instructions and guidelines and part guide/director videos
- 60 hours audio editing, mixing and production time.
- 60 hours of video editing time
- 15 hours of admin time back and forth while mixing and editing.
Director
- 30 hours (estimated) of director’s interaction with kids to help them get their videos submitted.
- 15 (estimated) hours of directors interaction/admin time during production.
Students
- 45 hours of student time (3-4 hours each)
The whole project required over 250 man hours to create a 3:55 min music video!
This equates to about 1 hour per second of finished video!
There are ways to stream line and save dozens or even hundreds of hours on this process!
Contact us for Details
Aardvark Hill Studio is available for virtual choir projects, in part or in whole, or for consulting on how best to produce this sort of work successfully with your own team of volunteers or paid contractors.
Spending an hour or two of time up front talking with someone who knows how to do this can save you dozens or even a hundred hours on your project!
If would like help creating a similar project for your choir or other organization, please feel free to contact us for anything from project consulting to full production. You can learn more about our services and our clients on our Recording page.
Bruce Searl
Aardvark Hill
Contact Us!
Recent Comments
-
My children just performed your beautiful song “River Run” at…
-
Donna B. on One Dream – SATB "WOW! WOW! WOW!!! This is such a great song! How…
-
Bruce on One Dream – SA "WOW! WOW! WOW!!! This is such a great song! How…
Most Liked Posts
- Self hosted audio post By Bruce on March 28, 2014 0
- Hello world! By Bruce on February 14, 2017 0
- Another Image Post By Bruce on March 29, 2014 0
[Twitter Widget Error] You need to authenticate your Twitter App first. Go to Highend Options > Social Links. Read the documentation to find out more.


Most Commented Posts